Body
About
This guide will demonstrate how to provision a new Google Chromebox for meets.
Environment
Google Meet.
Adding a Resource
-
Login to your Google Admin console account
-
Once you are logged in select building and resources

-
Under Resource management select Open
-
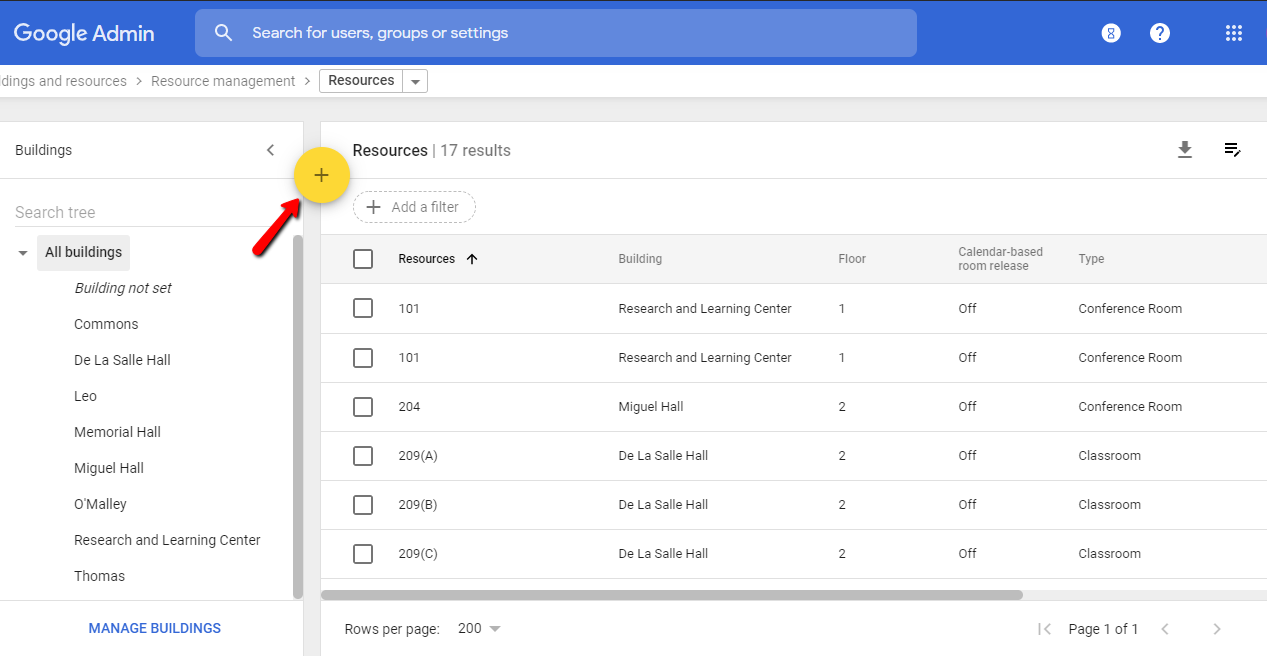
Now you have reached the resources section, this is where you will be able to select or add multiple buildings/rooms and assign them to different devices
-
Select the yellow circle which is the add option

-
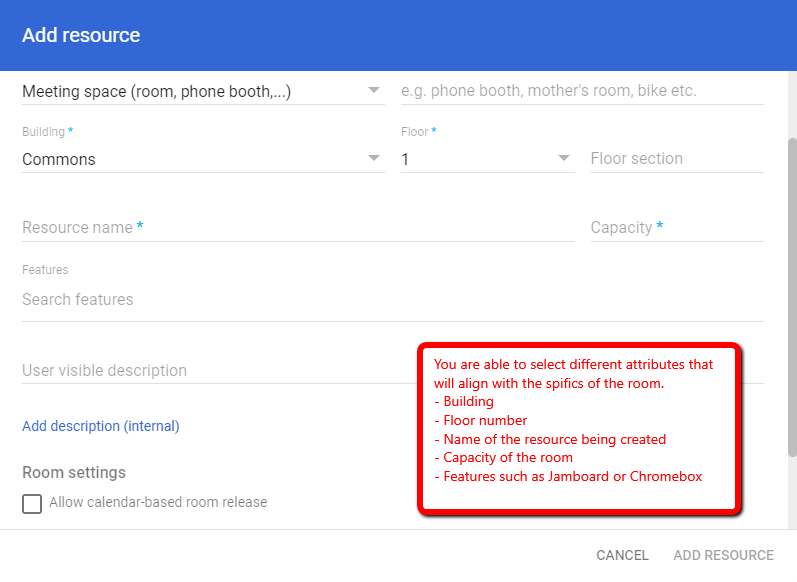
This will open a dialogue box in which you could add several attributes to create a resource.
-
If you are setting up a device(chromebox/ jamboard) for a specific building/room you will add in the attributes specific to each building/room
-
When adding in a resource name it will be the name or number of the room for example RLC 103’s resource name will be 103

-
Once all of the attributes are filled out select Add Resource
-
Once that is completed you can go back and make changes to your resource by selecting it and editing the fields in which you choose to change
Provisioning a Chromebox for Meets
-
Gather and setup a mouse, keyboard and the chromebox device you will be provisioning
-
Turn on the chromebox device
-
Once it is powered on you will be prompted to enter the username and password of your google admin console account
-
Once the google account info is entered the chromebox device should be provisioned. You can check this by logging into the google admin console selecting devices and google meets hardware. The device should be listed under provisioned.
Adding a Chromebox for Meets Device to Building Resource
-
Go to Devices
-
Select Google meeting room hardware
-
Select the device you will be adding to a resource
-
Scroll down until you see calendar assignment, click on the arrow
-
Click on Room Calendar
-
Type in the resource you are looking for
-
Click Save