Body
Issue
Your Internet may not be functioning as intended. This can also fix VPN issues from a Virtual Machine as described in this KBA: Lost Access to VPN on Virtual Machine
Environment
Windows 10
Resolution
Disabling adapter
To disable a network adapter using Control Panel, use these steps:
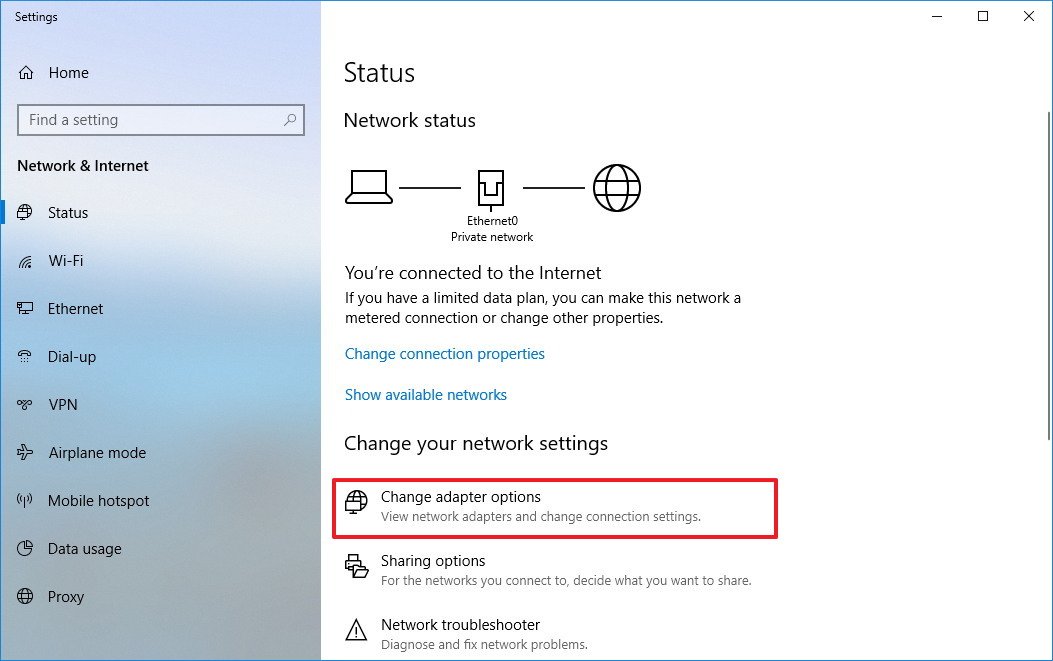
- Open Settings.
- Click on Network & Security.
-
Click on Status.
Hint: You can also quickly access these settings by right-clicking the network icon in the taskbar and selecting the Network & Internet settings option.
-
Click on Change adapter options.

-
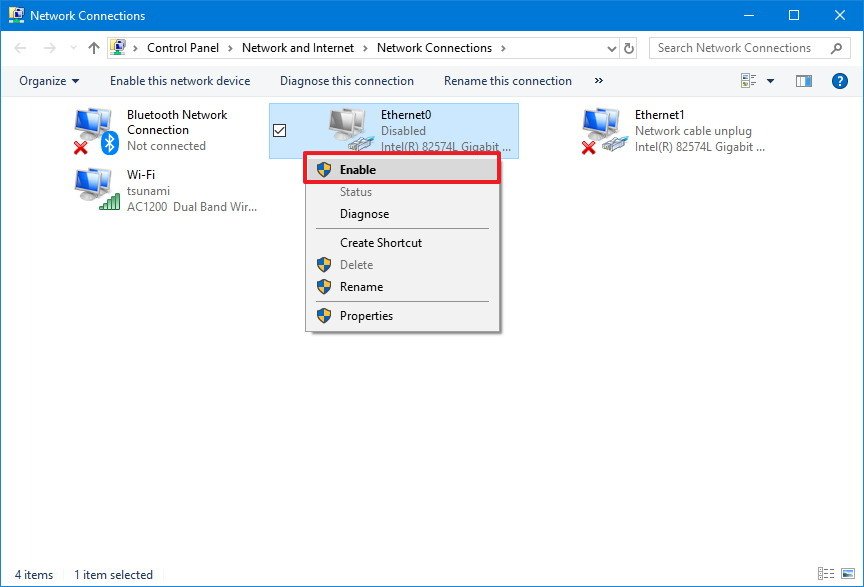
Right-click the network adapter, and select the Disable option.

Enabling adapter
To enable a network adapter using Control Panel, use these steps:
- Open Settings.
- Select Network & Security.
- Select Status.
- Select Change adapter options.
-
Right-click the network adapter, and select the Enable option.

For more help, please contact ITS at its@manhattan.edu or 718-862-7973.