About
This guide will take you through the steps of using the Hybrid learning environment in Leo 430.
Environment
The Desktop PC in Leo 430 and attached camera system.
Steps
-
Utilizing the teacher's station PC log into your @manhattan.edu account and access the Google meet or video conferencing software you are using for your event.
-
Once you have accessed the meet, you may need to adjust the audio/camera settings. This can be done by selecting the icon with the three vertical dots at the bottom of the meet screen and then selecting “Settings”.
Figure 1.

Figure 2.

-
The settings will automatically open to the “Audio” tab which shows the Audio settings. You can use the drown arrow in the box to select the proper microphone and speakers. The picture below shows what the microphone and speakers should be set to.
-
The Microphone that should be selected is called “Shure P300 Echo Canceling Speaker”
-
The Speakers that should be selected are called “Default- Crestron 420 (NVIDIA High)”
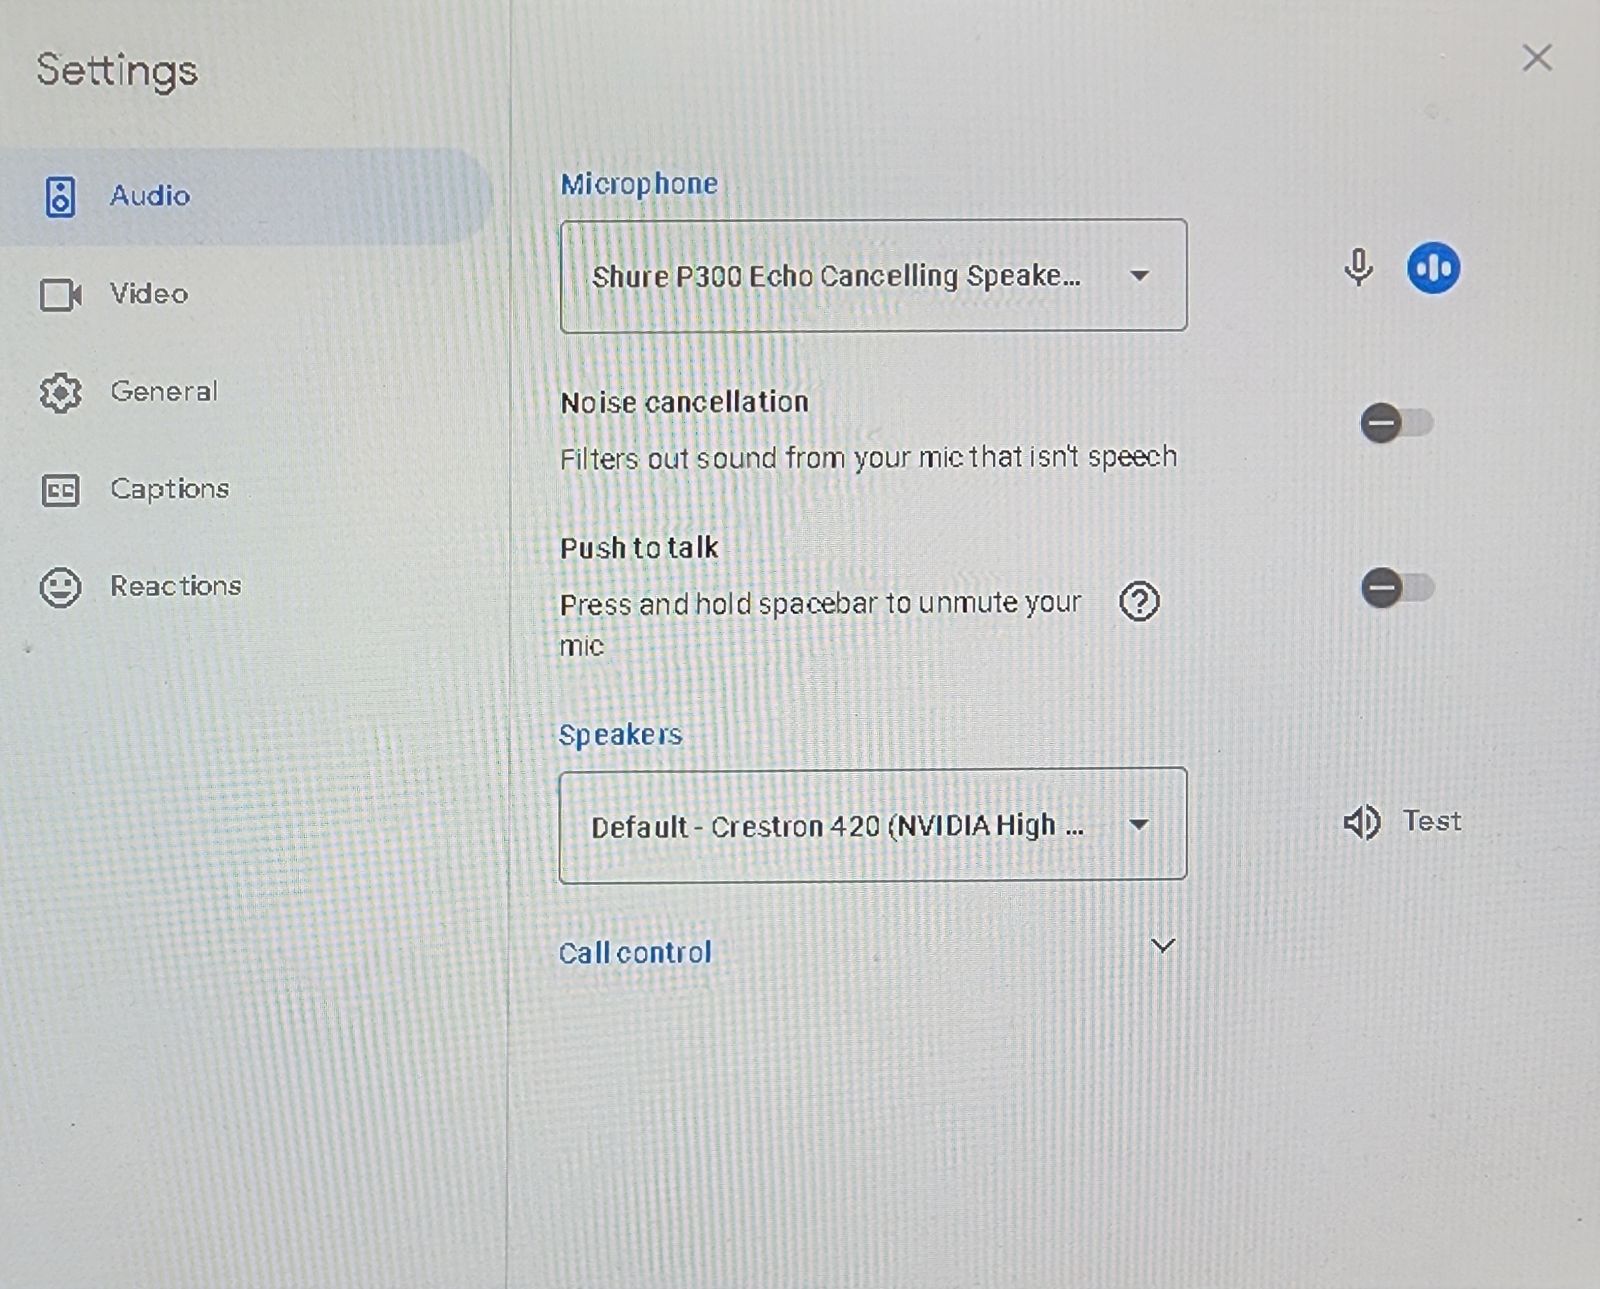
The microphone is designed to transmit sound from the entire room, prioritizing where the sound is loudest.
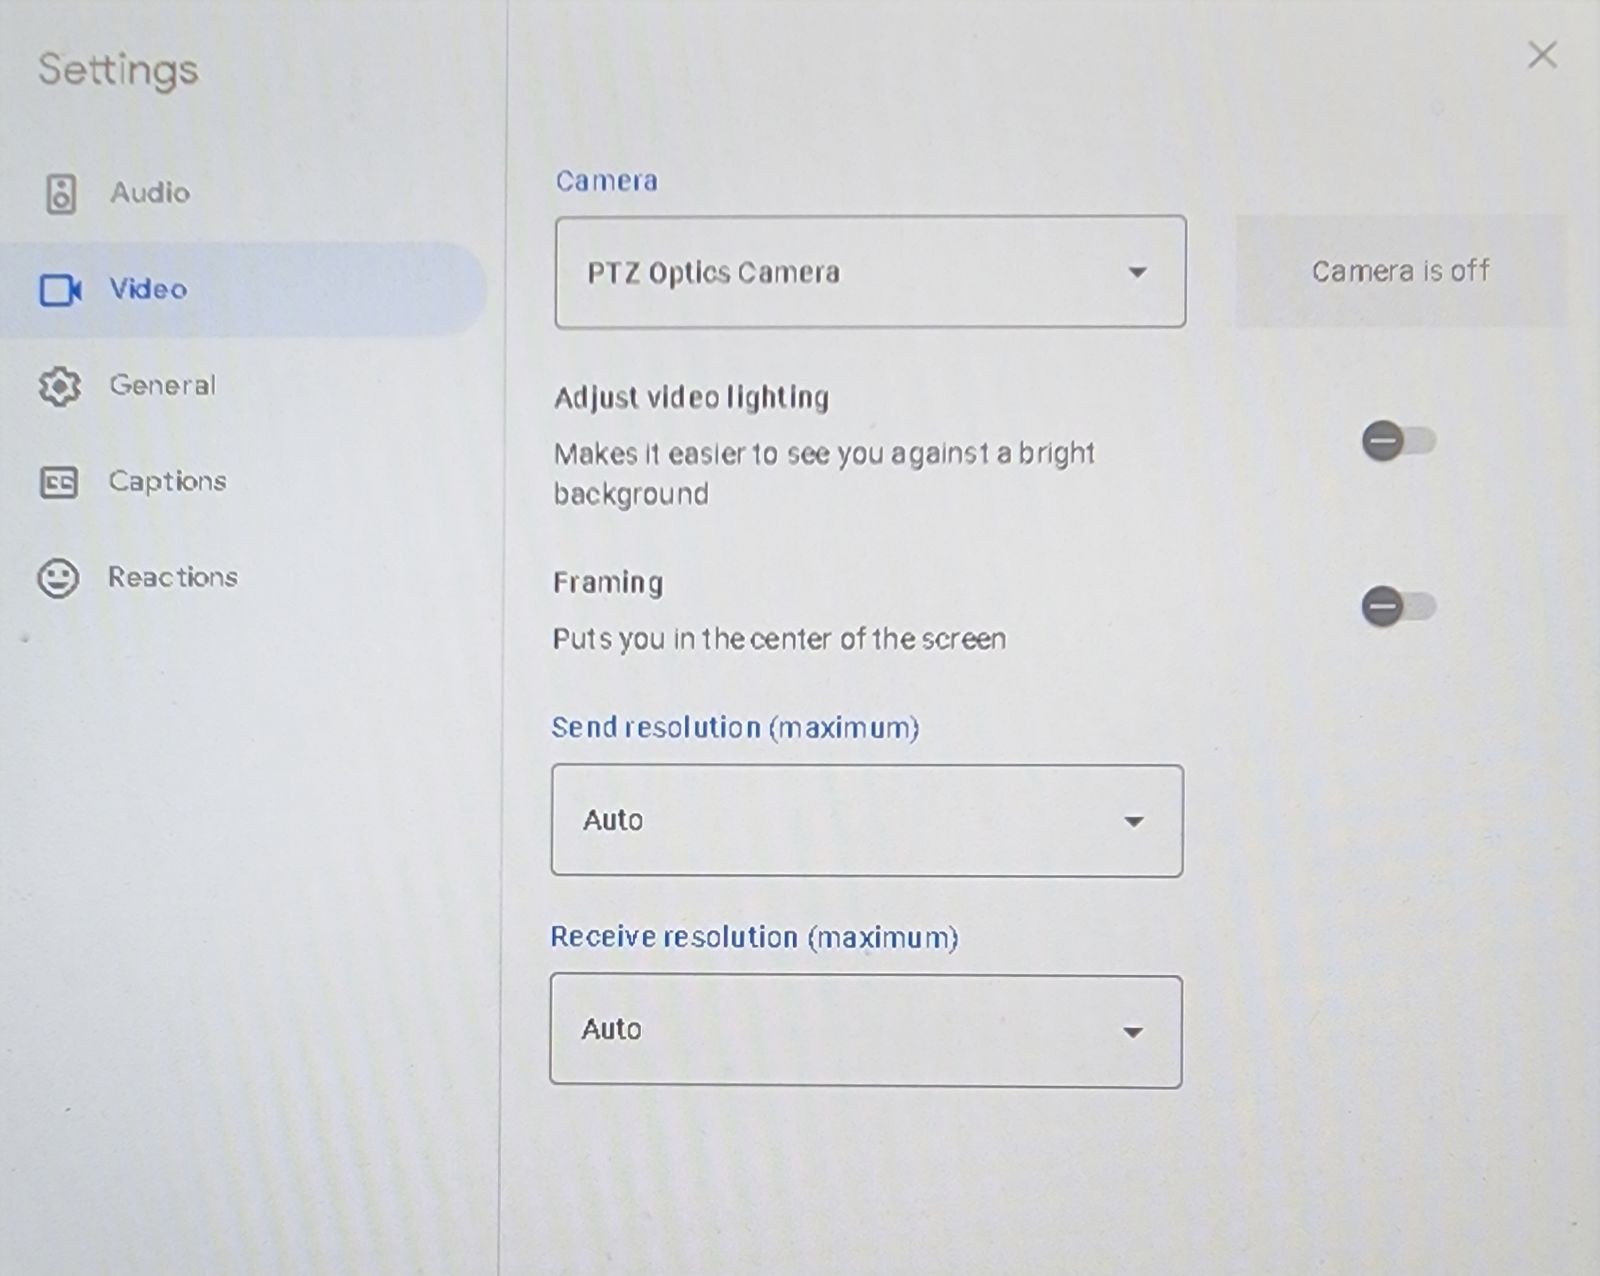
4. Next, click on the “Video” tab to adjust the camera settings. The picture below shows what the Video settings should be set to.
-
The Camera that should be selected is called “PTZ Optics camera”
5. Once all settings are correctly configured, click the “X” at the top right corner of the settings window. From there you can use the remote to position the camera.
Camera Remote Control Guide
Please note:

For more help, please contact ITS at its@manhattan.edu or 718-862-7973.